“`html
Best Practices for Arranging a Gallery Wall
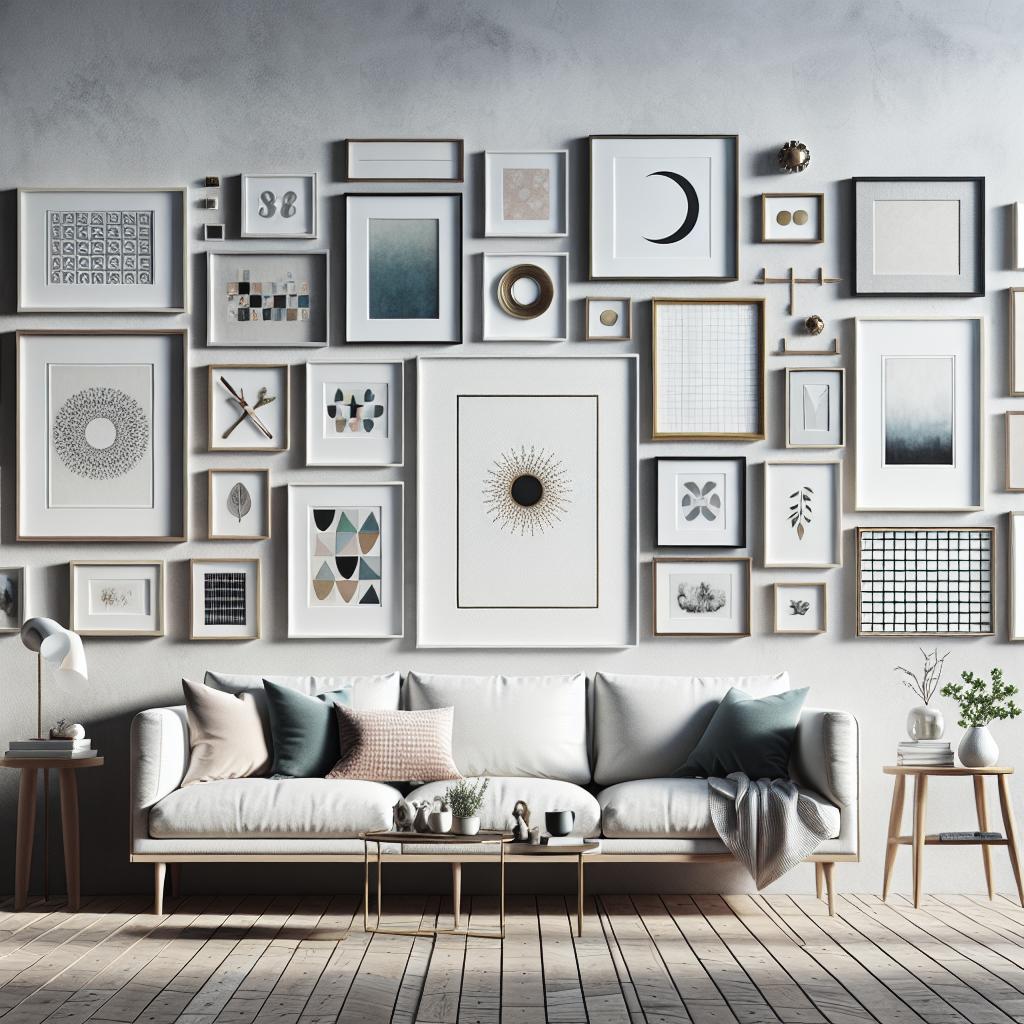
Creating a stunning gallery wall is an art form in itself. A well-curated gallery wall not only showcases your personal taste but also brings a dynamic focal point to any room. This blog post explores the best practices for arranging a gallery wall, offering valuable tips and tricks to achieve the perfect look. From strategically laying out your pieces before you hammer in the first nail, to blending different frames and introducing personal touches, these guidelines will help you compile a cohesive collection that enhances your space. If you’re looking to master the art of the gallery wall, keep reading for a comprehensive roadmap to design success.
FIRST, DON’T GET ALL HOLE-Y – LAY OUT YOUR GALLERY WALL BEFORE YOU HANG IT
Before you start hammering away at your wall, it’s essential to plan your gallery layout. Begin by gathering various-sized frames that you’d like to include. Once you have your collection, lay out your pieces on the floor to experiment with different arrangements. This will help you visualize how your pieces will interact with each other and create a cohesive look.
Consider using butcher or craft paper to cut out the shapes corresponding to your frames. Tape these paper templates onto your wall to try out different configurations while keeping the overall balance and symmetry in check. This trial run ensures you can make adjustments before making any permanent changes and preserves the integrity of your wall by preventing unnecessary nail holes.
CREATE A COHESIVE COLOR PALETTE FOR A PULLED TOGETHER LOOK
The magic of a gallery wall often lies in its visual harmony. A cohesive color palette helps in achieving this. Whether it’s the frames, the art pieces themselves, or a combination of both, using a consistent palette can tie disparate elements together. A simple approach is to choose three colors that dominate your collection and ensure they are evenly distributed across the wall.
Consider the room’s existing color scheme and select hues that will complement the environment. Remember, the art should add to the ambiance without clashing with other decor elements. If you want a more eclectic look, a monochrome palette with varying textures and shades can add depth while maintaining cohesiveness.
GO BIG – START WITH SOMETHING LARGE AND IN CHARGE TO ANCHOR THE WHOLE COLLECTION
When designing your gallery wall, start with the largest piece to serve as an anchor for the rest of the collection. This prominent piece draws immediate attention and sets the tone for the surrounding artwork. Place this focal piece at eye level for the best impact.
Balancing the large piece with smaller pieces around it creates a natural flow and prevents the wall from feeling too weighted on one side. Use the size and placement of the central piece as a guide to arranging additional artworks to achieve a balanced and harmonious layout.
IF YOUR BIGGEST PIECE IS #1, THEN YOUR NEXT BIGGEST PIECE IS #2
Once you’ve placed your largest piece, it’s time to introduce the second largest piece into your arrangement. The secondary piece should complement the focal artwork, whether in theme, color, or style. Careful consideration of its placement is necessary to maintain balance.
This piece might serve as a bridge between the larger piece and smaller elements, ensuring the eye moves naturally across the gallery wall. Vary its position to see how shifting it affects the overall composition, enhancing the balance and flow of the gallery.
MIX YOUR HORIZONTALS & VERTICALS (AND GIVE PAIRS A TRY)
Diversity in orientations is key to a dynamic gallery wall. Incorporating both horizontal and vertical pieces can create visual interest and variety. Mixing these dimensions helps avoid a monotonous layout and adds an element of surprise.
Additionally, consider pairing similar-themed artworks, either side-by-side or in a staggered arrangement. Pairing works provide symmetry and can create intriguing focal points throughout your gallery. Don’t shy away from experimenting with unconventional placements to see how they enhance your wall.
WHILE WE’RE AT IT, DON’T FEEL LIKE YOU HAVE TO STICK TO ONE TYPE OF FRAME – MIX IT UP
Incorporating a variety of frames can add an eclectic touch and enhance the overall appeal of your gallery wall. By mixing different materials, colors, and styles, you can create depth and texture, making each piece stand out while maintaining cohesion.
Contrast sleek metal frames with rustic wooden ones, or introduce colored frames for a pop of color. The key is to ensure that, despite the differences, the frames have some common element tying them together, whether it’s a shared color or style.
DON’T BE SUCH A SQUARE – NOT EVERYTHING HAS TO BE FRAMED (OR SQUARE)
While frames offer a classic look, not all artwork demands to be enclosed. Explore frameless options or unusual shapes for a fresh twist on your gallery wall. Canvas prints, shadow boxes, and unframed paintings can add dimension and keep the arrangement from feeling too boxy or constrained.
Artwork with unique shapes, such as circles or hexagons, can become intriguing focal points. Incorporating these elements among traditional framed pieces can create a more dynamic and modern appearance for the wall.
WHEN IN DOUBT, FLOAT MOUNT
Float mounting is an elegant technique to display your artwork without feeling restricted by the frame edges. This method allows your art to “float” inside the frame, creating a sense of depth and highlighting the pieces’ individuality.
By float mounting, you emphasize the artwork itself, drawing more attention and adding a refined touch to the overall gallery wall. This method is especially useful for pieces with detailed edges or artworks that deserve extra attention.
ADD SOMETHING PERSONAL – ANYTHING CAN BE ART
Your gallery wall should be personal and reflect your unique style. Incorporating personal items like travel souvenirs, concert memorabilia, or family photos can infuse the space with character and tell your story.
Don’t limit yourself to traditional artwork; everyday items like postcards, hand-written notes, or fabric swatches can add a touch of authenticity. By doing so, your gallery wall becomes a curated expression of your life and experiences.
WANT MORE OF WHERE THAT CAME FROM?
If you’re inspired by the process, don’t stop at just one wall! Consider expanding the gallery concept to multiple rooms or walls, making a cohesive theme throughout your home. Vary the styles and arrangements to suit each room’s purpose and vibe.
Additionally, stay curious and open to changing and updating your gallery wall. Swap out pieces to keep the display fresh and aligned with your evolving taste or latest travels. A well-maintained gallery wall remains a dynamic element of your home decor.
Summary of Main Points
| Tip | Description |
|---|---|
| Layout Before Hanging | Plan and test your arrangement using paper templates. |
| Cohesive Color Palette | Choose complementary colors for a harmonious look. |
| Start with a Large Piece | Use a prominent central piece to anchor your wall. |
| Introduce a Secondary Large Piece | Follow up with the second largest for balance. |
| Mix Orientations | Use horizontal, vertical, and paired arrangements for variety. |
| Variety in Frames | Combine different frame styles for depth and texture. |
| Explore Shapes | Include unframed and unique-shaped art for interest. |
| Float Mounting | Use float mounting for an elegant, focused presentation. |
| Add Personal Touches | Incorporate personal items to make the gallery meaningful. |
| Expand and Refresh | Continue expanding your gallery and keep it updated. |
“`